


Understanding Exchange Online licensing can be tricky. You would think that there’s no great philosophy out there – you assign a license, and a user gets a mailbox. The thing is, there are various plans, each slightly different and each with its own features and limits. I’ll try to explain:
- how concurrent Exchange Online licensing works,
- what’s the difference between Exchange Online plans and
- how to assign licenses to users.

Concurrent Exchange Online license assignments
In Early 2023, the Exchange Team announced support for concurrent Exchange Online license assignments. It allows Microsoft 365 admins to assign more than one license pack to the same Azure Active Directory (AAD) user. Thanks to this, you should no longer get the annoying error while assigning licenses:
You can’t assign licenses that contain these conflicting services: Exchange Online (Plan 1), Exchange Online (Plan 2). Review the services included with each license, and try again.
Before the introduction of concurrent Exchange Online licensing, you needed to first remove one license and then assign the other. This often imposed the risk of having mailboxes without any Exchange Online license assigned. Now, it doesn’t matter if you want to promote or demote someone’s license plan – you can add and remove certain license packs in one go.
The change is exceptionally useful for those who manage permissions using groups. Now, resolving conflicts for some users doesn’t require as much effort.
There’s a catch though. Now, it’s possible to have, for example, Office 365 E5, Office 365 E3, Exchange Online (Plan 1) and Exchange Online (Plan 2) assigned to a single user. But Office 365 E5 contains all features from the other plans + more. In other words, if you aren’t careful, you can lower the number of licenses available in other pools – these are the licenses which could potentially be assigned to other users.
Sounds like rocket science? Well, it isn’t. In the next part I’ll do my best to explain how the Exchange Online licensing works.
Exchange Online license plans
Theoretically, there are only 3 license plans strictly for Exchange – Exchange Online Kiosk, Exchange Online (Plan 1), and Exchange Online (Plan 2). They all give an end user a mailbox with some additional benefits. Plan 2 (the priciest of the three) has some advanced features like:
- Capability of In-Place or Litigation Hold
- Microsoft Purview DLP
- Exchange Online Archiving
The difference is also in the mailbox and its archive size. The article below goes into more detail:
Learn more about mailbox size and archiving in Microsoft 365
Pretty simple, up to this point, right? Then add to it that some licenses, like Office 365 E3, have built-in Exchange Online plans; or using a separate Exchange Online Plan (1 or 2) is not too common, since, while it comes with a fully functional mailbox, it doesn’t include Microsoft Apps for Enterprise (like Outlook, Word etc.). That’s still not all: Exchange Online Archiving is available as an “add-on” license for the cheaper Plan 1 and Kiosk plans…
As you can see, while it isn’t exactly rocket science, it might be quite challenging to make sure each employee has all the features they need, while not overpaying for features they don’t use.
How to assign Exchange Online licenses
Before you start assigning Exchange Online licenses, you need to have them available. To check the quantity and usage of licenses, or to buy more, you can go to Billing > Your products in the Microsoft 365 admin center (link).
Microsoft Azure Portal
The traditional way to manage licenses is assigning them via groups. You assign certain license policies to certain groups and if you have spare licenses of the selected plan, each group member is licensed according to the rule. Simple and efficient.
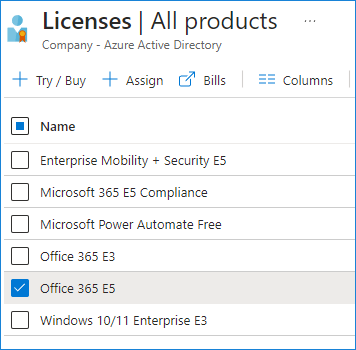
Group license assignment is done via the Licenses page in Microsoft Azure portal. To assign a certain license pack, like Office 365 E5, click it:
Click Add users and groups, select a user or a group you want to assign the license pack to and then click Select:
Microsoft 365 admin center
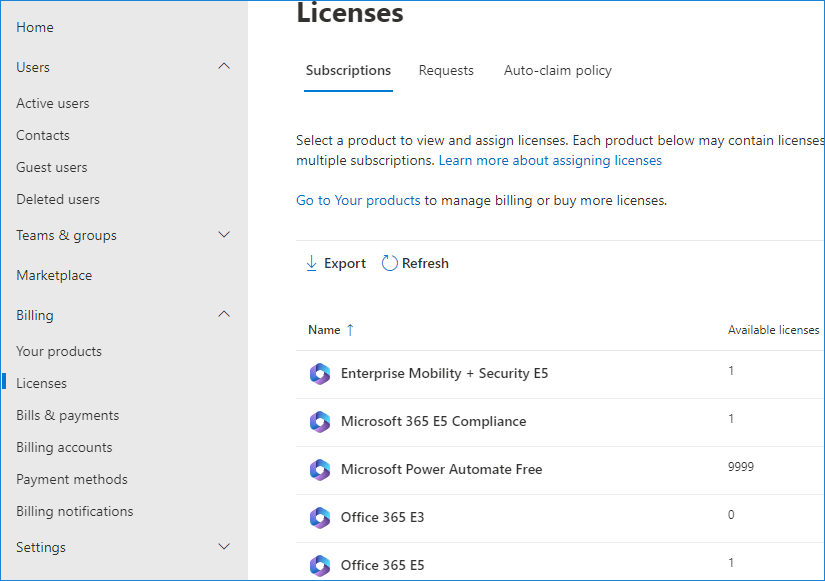
Another way to assign Exchange Online licenses is to manage them manually from Billing > Licenses in the Microsoft 365 admin center (link).
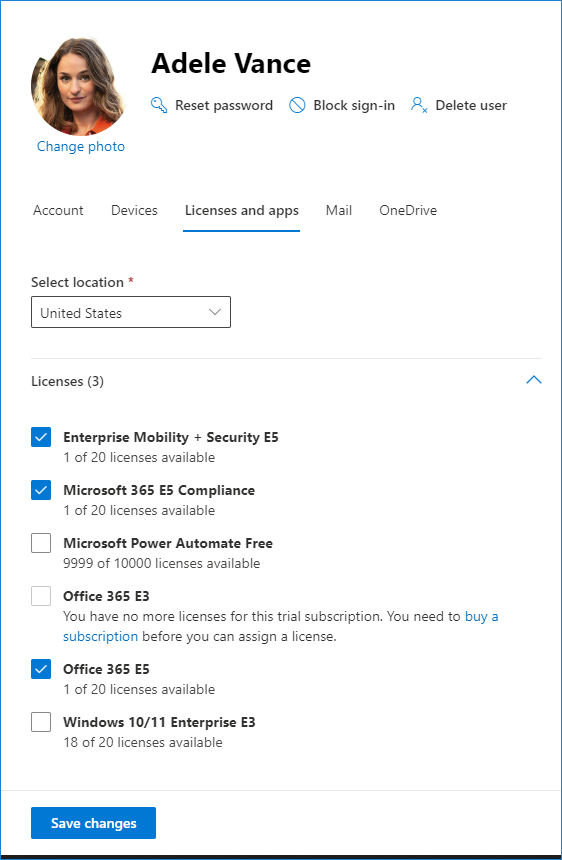
That’s not all, you can use the Active users page (also in the Microsoft 365 admin center). From there, select one or more user accounts and go to Licenses and apps tab to assign or unassign available license packs.
Finally, you can use PowerShell.
Exchange Online license management with PowerShell
Exchange Online licenses are currently managed using Microsoft Graph. If you haven’t installed the Microsoft Graph module yet, use this cmdlet before you start working with licenses:
Install-Module Microsoft.Graph -Scope CurrentUser
Then connect to Graph using the following cmdlet:
Connect-MgGraph -Scopes User.ReadWrite.All, Organization.Read.All
To check available licenses, use Get-MgSubscribedSku. The cmdlet returns information on all the license packs you have available – the most important being their IDs and consumed units. You will need the license pack IDs (SkuId) to assign licenses to users in the next step:
Set-MgUserLicense -UserId <user’s UPN> -AddLicenses @{SkuId = "<SkuId>"} -RemoveLicenses @{}
The cmdlet requires the -RemoveLicenses parameter, even when you don’t want to unassign any licenses. That’s why you see the empty array in the cmdlet above. However, if you want to upgrade or demote a license for a user, it’s good to use both -AddLicenses and -RemoveLicenses parameters.
Read also
cloud.microsoft – what’s that and how it affects you?